Wilkanowski “cira 1947 #1456”

Fiddle

Year:

1947

Materials:

Back Maple
Top: Spruce
Neck: Maple

Finish:

Spirit Varnish

Dimensions:

Body length: 363 (13 7/8″)
Bouts: 164, 112, 302
Ribs: 29.5 all round
String length: 330
Stop: 194

Notes:

This is a follow up to the Dimpled Viola.  The sides on that instrument reminded me of reptile skin and that inspired me to try make something that played up those reptilian qualities.  The dimples on the viola, which were somewhat random have been formalized, enlarged and made symmetrical about the centerline. Read more about the ideas behind this fiddle

Pointy Objects – Fingers Beware

Finished sharpening my chisels and gouges. Prepping for some purfling channel work.

One of the most used tool(s) on a violin makers workbench are chisels and gouges. Gouges more than chisels for me. And they all need to be razor sharp. Sharp like, whoops there goes the end of a finger. Hopefully not, but they need to be that sharp. A dull tool is more dangerous, how? I elaborate below.

Sharpening tools is a straight forward process that involves a blade, stones and lubricant. However, straight doesn’t mean easy. In my wood working practice it took me a long time to get sharpening right. The right angle, the grits, how many passes across the stones, testing and stropping all go into a sharp clean blade. I didn’t have a mentor showing me the proper what to sharpen tools. So, lots of YouTube videos later and I found a system that works for me.

Why is a sharp blade safer than a dull one? I say it’s a couple of things. Number one, you don’t have to use as much pressure to get a good result. Second, you have more control. Whenever you have to start hammering, jamming or being rough with a chisel, beware fingers. The more aggressive you have to be with a chisel, the less safe it becomes.

So, go out there and sharpen your chisels well. Be safe and keep your fingers and flesh behind the blade at all times. 🙂

Skeleton Mold

The skeleton mold is a steady and true mold for me. I got the inspiration from Andrew Carruthers. After reading and researching his methods and my propensity to do things my way, I used this mold for several models. I love it. So much easier to clean up the inside of the ribs before popping off the mold.

I started with a traditional mold in my violin making journey. Then one day, I saw in TheStrad an article and a related pdf detailing how Andrew uses a skeleton mold. I was immediately drawn to the unusual approach. It seemed so elegant and simple; yet versatile and evolved.

So, I built my first mold using old hardwood flooring from a friend. I said to him, “I’m going to use your old floor to make the foundation of my next violin.” I made my subsequent traditional violins using skeleton molds and haven’t gone back. I can’t see a reason to go back. It forces me to be more diligent when bending ribs; my linings are cleaner and have less tool marks; and popping off the mold is easier.

Now, making violins with a skeleton mold is not going to put me on a “naughty” list. Plenty of things will but this doesn’t seem to be one of them. From what I have read in forums, not many people are using or even trying this method. I’m sure factors like “I do it this way” and “why change a good thing” influence people’s choice to stay with their system. I get it, it’s just not how I like to do things.

I prefer to do things the first time by prescribed traditional means. Then I reflect on why do I have to do it this way and then make changes that fit me. The violin mold was no different. There are inner molds, outer molds and no molds (glue ribs to the back). I only asked questions about the violin mold based on those three types of construction. I didn’t even know there was a forth. I know a skeleton mold is not for everyone but for me it fits into my regime and makers’ philosophy.

Varnishing – A hanging trio in the white

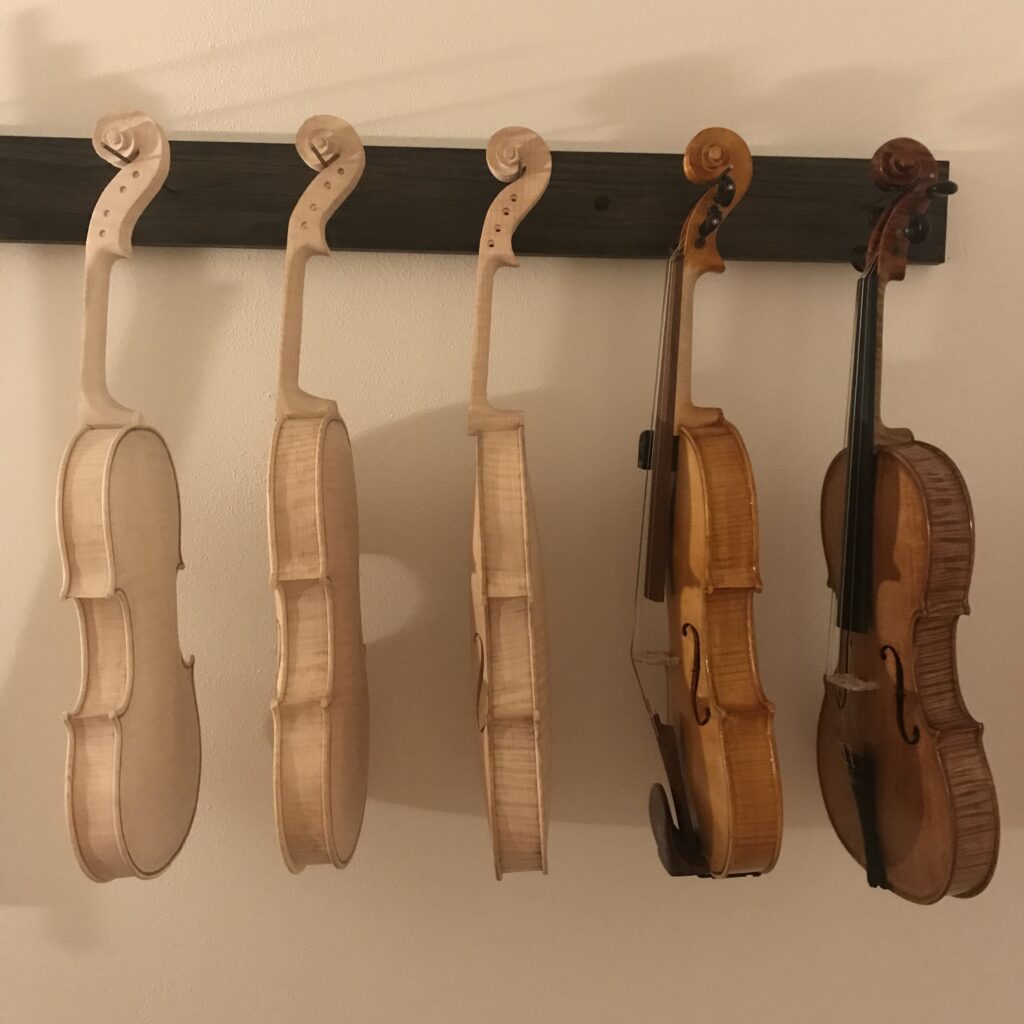
A few violins in the white are ready for varnishing. Things are getting serious. I love the look of future instruments just waiting to be played.

Right now the scariest time for me in the violin making process is varnishing. It’s a mix of alchemy and experience. The first is elusive and there are more options for formulas and off the shelf solutions with no clear guidance. The second can only be obtained by someone with a particular alchemy or oneself practicing the application of the varnish.

I have tried varnishing two to three violins at once and doing each one as they are finished. I still can’t tell which I like better. The nice thing about doing one at a time is I only make small batches at time. So, little varnish is wasted and I can review my process each time I make it. Doing more than one at a time let’s me settle into the varnishing routine so I feel more in tune with the process.

I still haven’t decided which I prefer. I’ve done both and neither feel that amazing. Varnishing is tough either way. It’s the last thing one does before setup and it’s a major component in selecting a violin. I have to be aware that people “listen with their eyes” even though the violin may sound great. The violin community is driven by the old and is weary of the new. I still find it hard to believe that something new made to look old drives the market. It is what it is.

I have to be frank with violinists who are interested in my violins and violas. I don’t make instruments to look old, I make them to get old with you. So, rather than abuse and distress a new violin, I’d rather you let your kids have a stab at it and let it age naturally.